Information you will need to complete the setup:
- Your email address
- Your email password
- Your server address (e.g. mail.infolog.ca or mail.infologistix.net)
If you don’t have this contact us email hidden; JavaScript is required and we will provide it
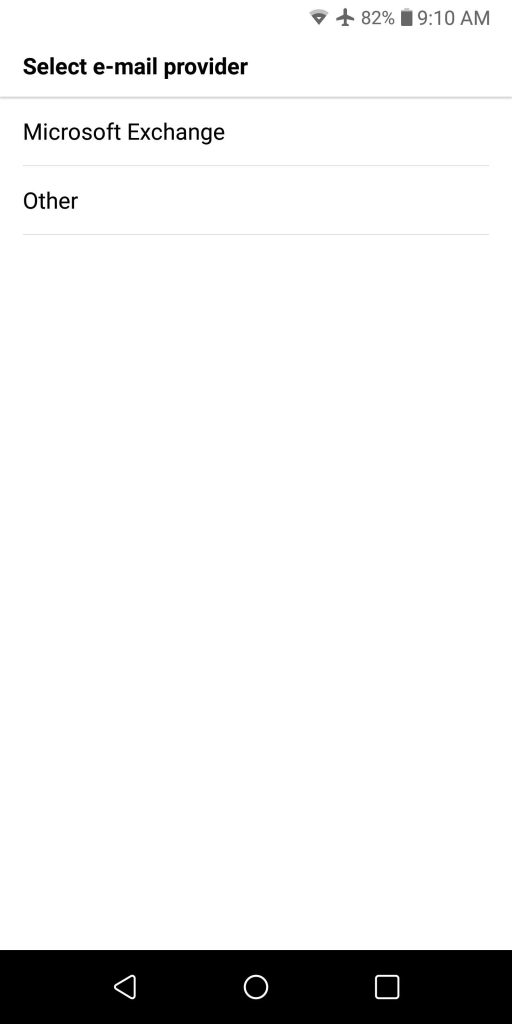
Step 1. Open the native Email app on the Android device. Tap on Other (if you have other accounts in the app you may want to look at slide 9. and then proceed to slide 2.)
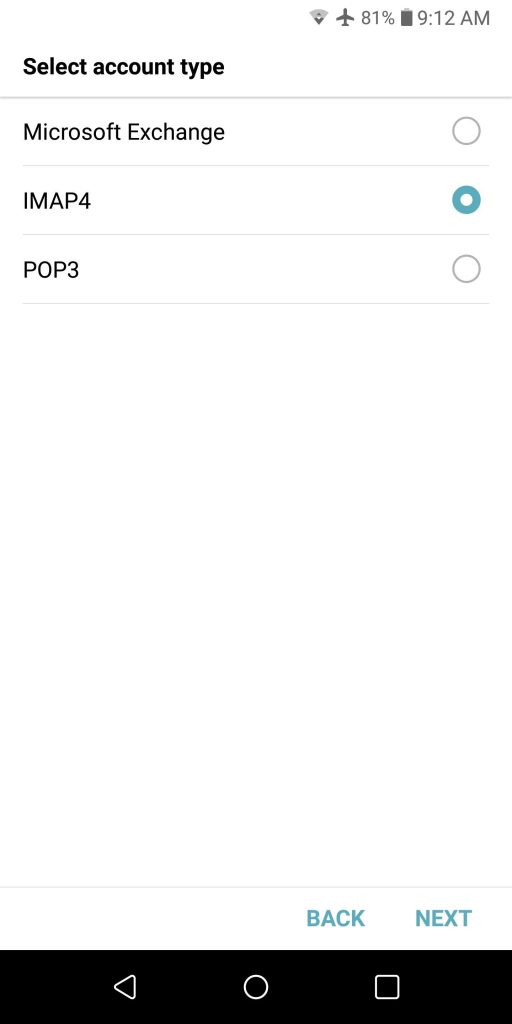
Step 2. Select IMAP4 and then tap NEXT
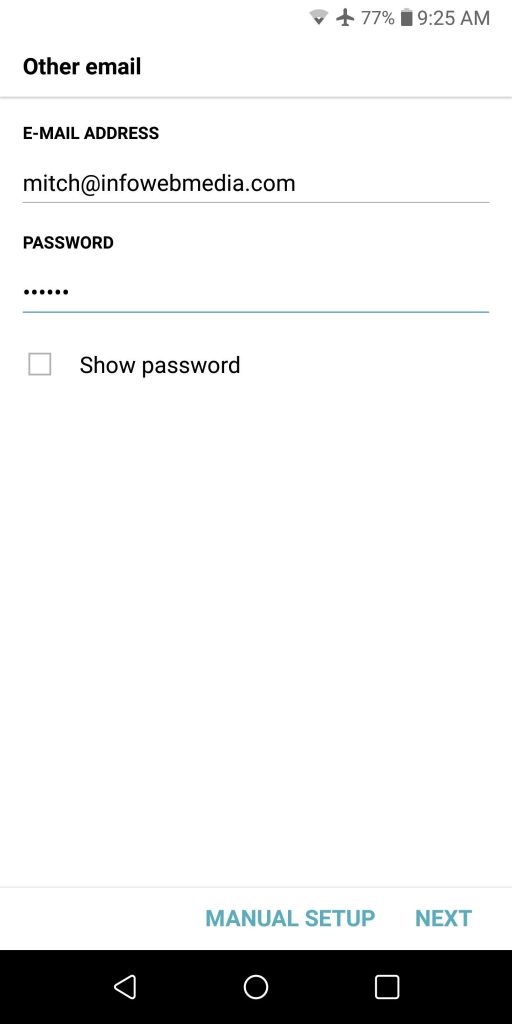
Step 3. Fill in your email address and password and then tap MANUAL SETUP
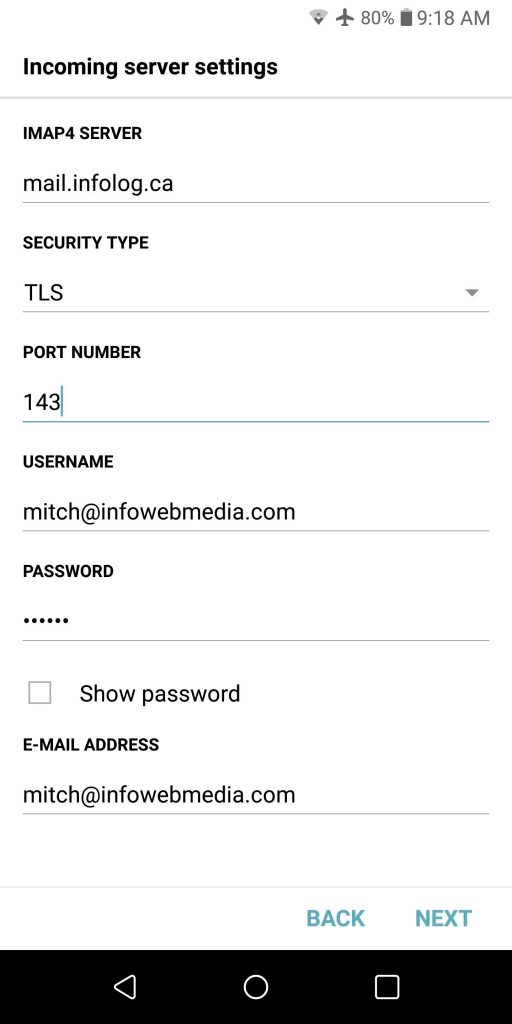
Step 4. Fill in your server address, select TLS for security type and 143 for the port number. The username is your email address. Fill in the password and email address fields with your information from the list you gathered at the top of this tutorial. Once the information is complete and correct tap NEXT.
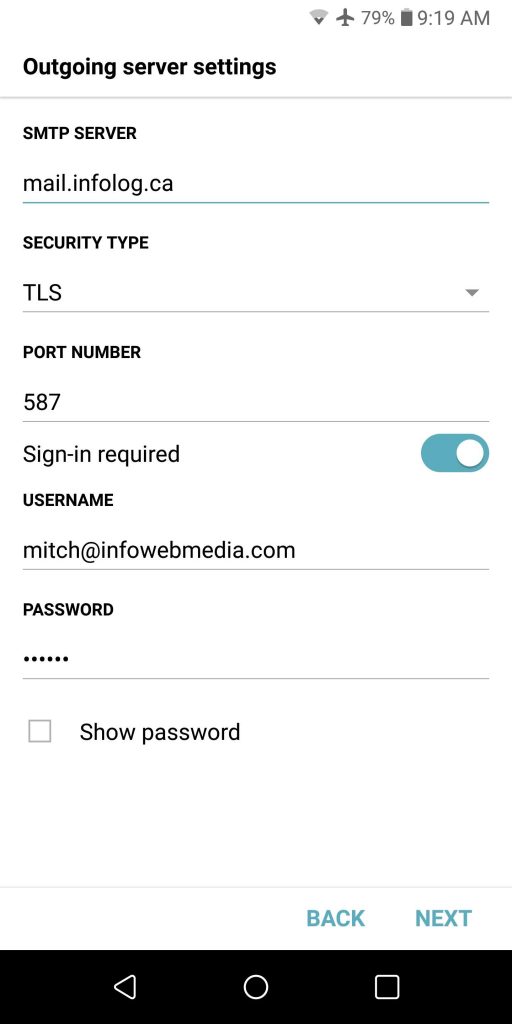
Step 5. Again, fill in the server address, select the security type. The outgoing port is 587. Make sure the username is your email address and toggle the “Show Password” box to ensure your password is correct. Then tap NEXT.
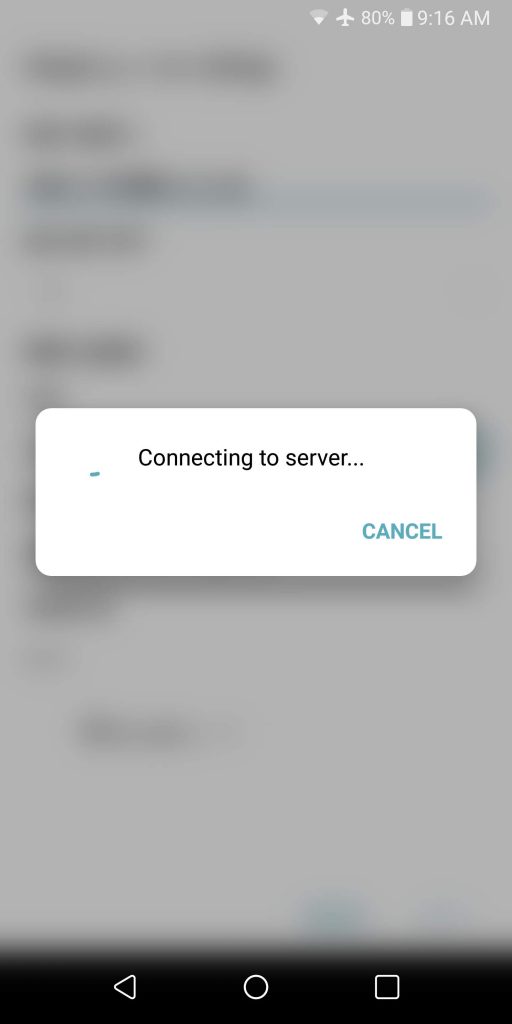
Step 6. The account will be registered on the server.
If you get an error check the settings. If you get errors and the settings look correct quit the process and start over (stop the app and start again, sometimes errors in information get cached and you have to start again to wipe the errors)
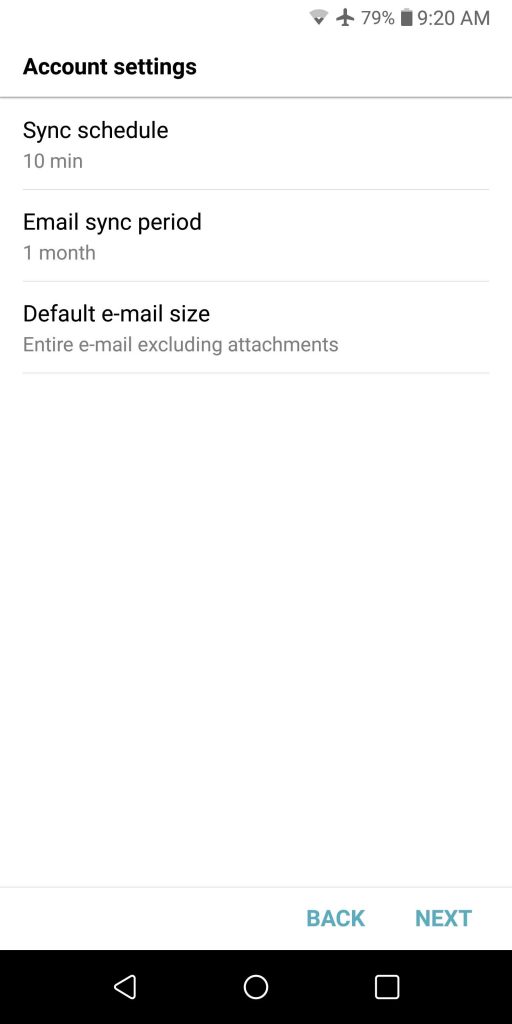
Step 7. It’s important to set the Sync Schedule so the app will automatically check for new mail in the background. The other settings are optional and can be left at default.
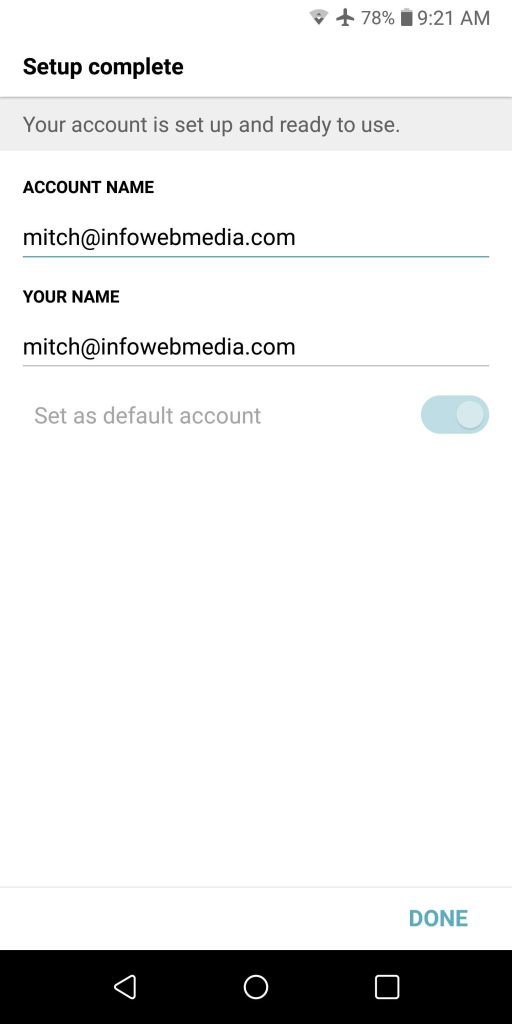
Step 8. Woohoo! It worked. You can set the name of the account to anything you wish, but I like to use my email address. It makes it easier to pick out for future support requests and troubleshooting.
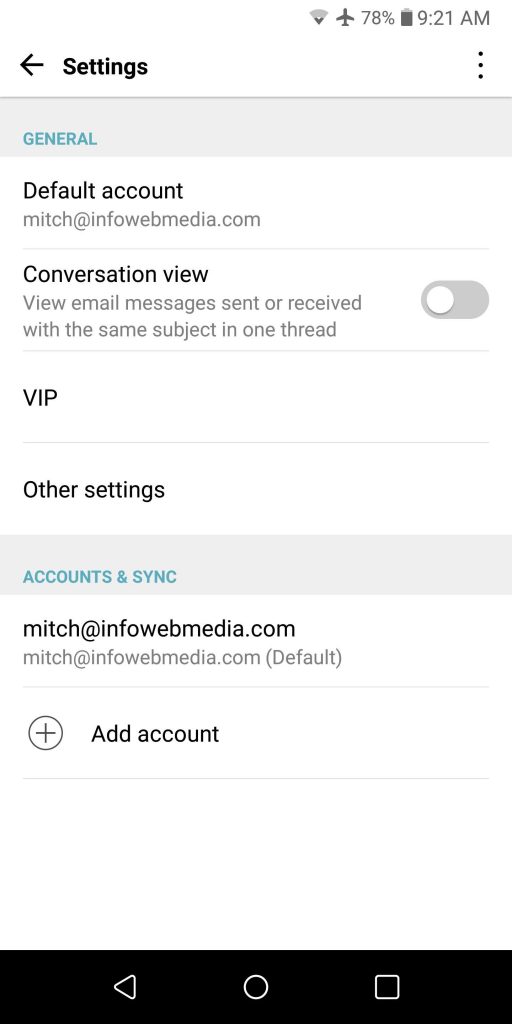
Step 9. Use this slide only if you had other accounts on your phone and you want to add a new one. Tap Add account, and then move back to Step 2. above.